Managing tokens
Accessing a Bytesafe registry requires a valid access token to use with the Bytesafe servers. Users can create access tokens either from Bytesafe or by using the npm client.
For Npm: Authentication by running npm login, automatically store a personal authToken for a registry in your .npmrc file. Users can also create an access token and manually input the information into the .npmrc file.
For NuGet: Create a token for a registry in Bytesafe and add it to your NuGet.Config file with nuget.
For Maven: Create an access token for a registry in Bytesafe. Provide information in ~/.m2/settings.xml to authenticate.
For Pip, create an access token in Bytesafe and add it to your ~/.netrc file.
Related information:
- Users working with a CI/CD pipeline may want to create a new CI/CD token.
- If you get Access Denied errors when interacting with Bytesafe? See Troubleshooting - Resolving access denied error.
- Don’t have an existing workspace yet? Read Getting started to get up and running in less than a minute.
Generate new token
Bytesafe users create their own access tokens, either for personal use or for use with CI/CDs.
Generate tokens from Bytesafe web application
Create an access token in Bytesafe by selecting Access tokens from the profile menu.
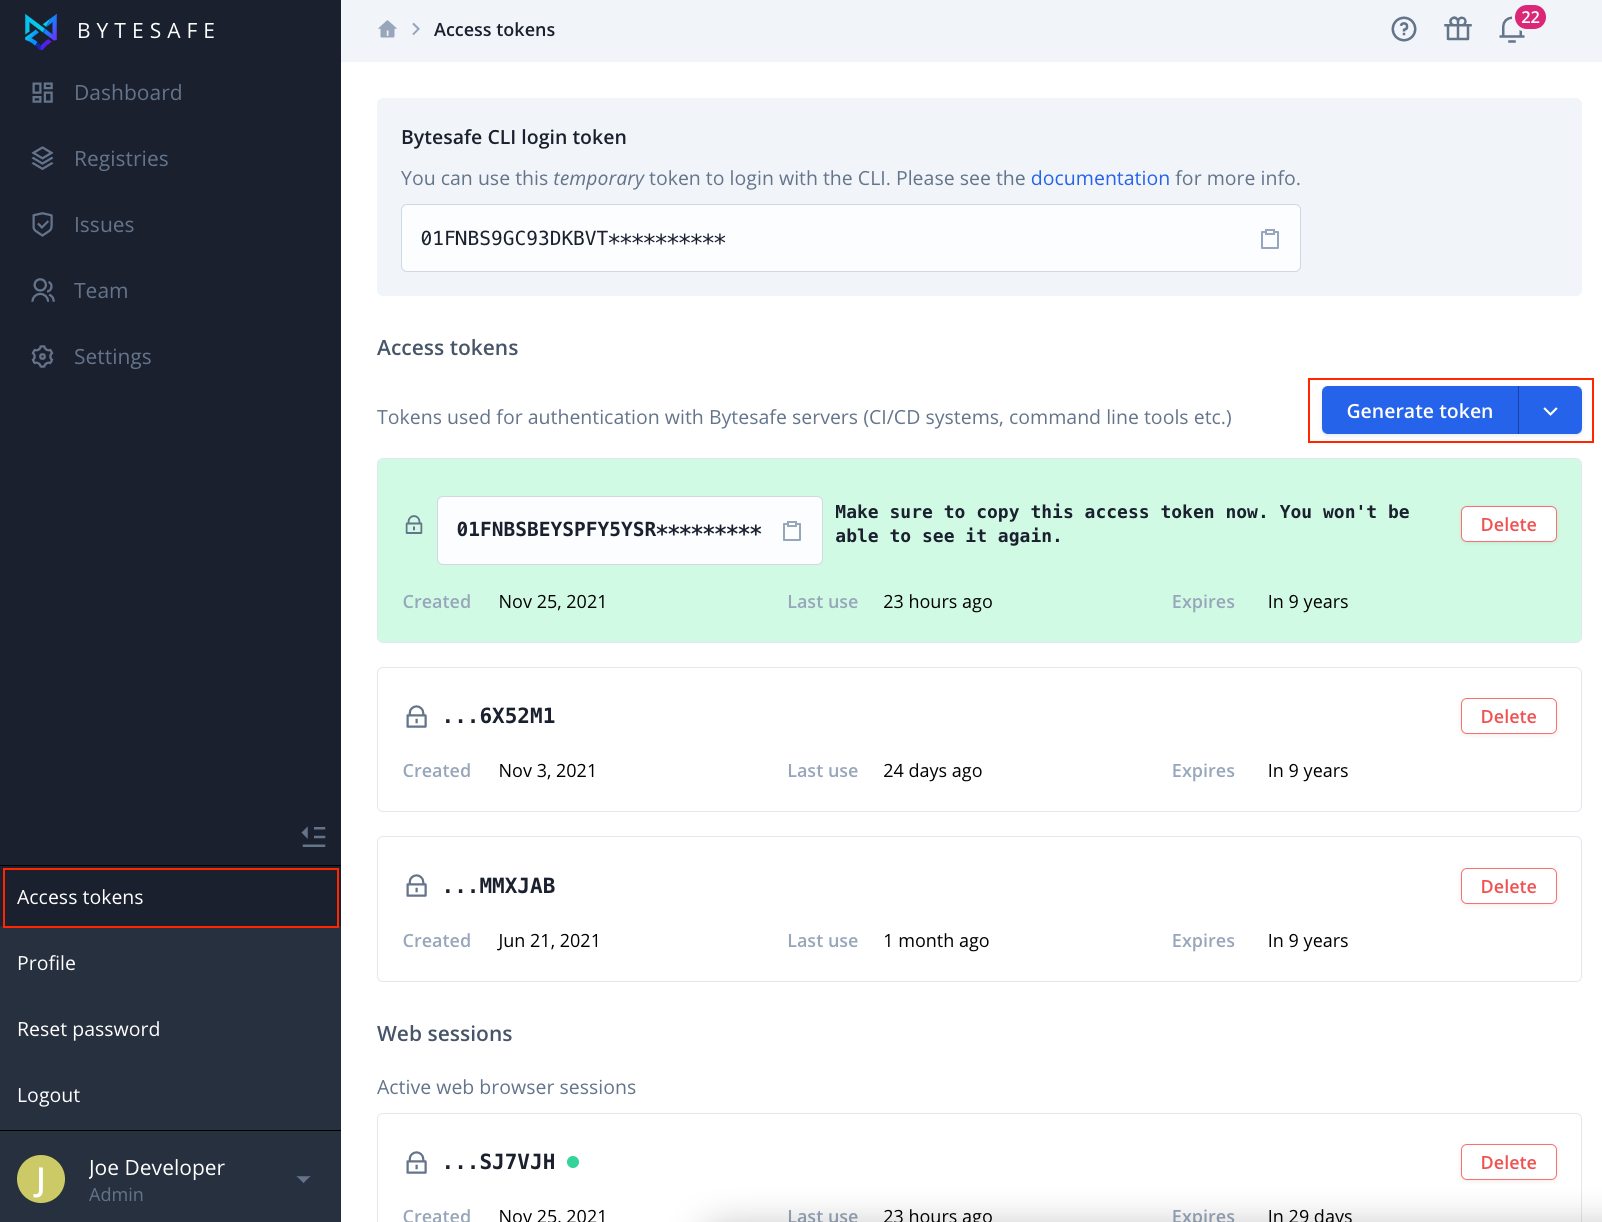
Both read-write and read-only tokens can be generated, for use with either npm, NuGet, Maven or Python.
Generate tokens using npm
Accessing a Bytesafe registry using npm clients (npm, yarn or pnpm) requires a valid access token in the .npmrc file (typically ~/.npmrc).
# access token for a registry is stored in .npmrc file
..
//{WORKSPACE}.bytesafe.dev/r/{REGISTRY}/:_authToken={TOKEN}
You add an access token to ~/.npmrc by running npm login command.
Credentials for authentication are available in Bytesafe.
Instructions, and the current session token, is found in the Registry Information available by clicking the More info button in the top right corner of a registry page:
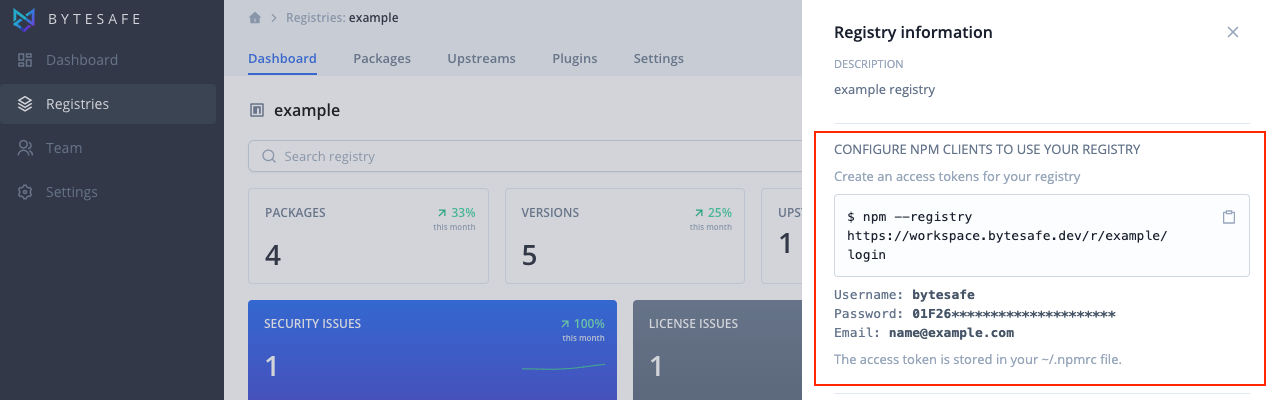
npm login, to exchange the session token for a long lived access token that gets written to ~./npmrc.For more instructions see ecosystem information for npm.
CI/CD tokens using npm
Creating a CI/CD token using npm requires a password (and prior authentication to the Bytesafe registry by the user).
Password is available in Registry Information in Bytesafe. Click the More info button in the top right corner of a registry page to access Registry Information:
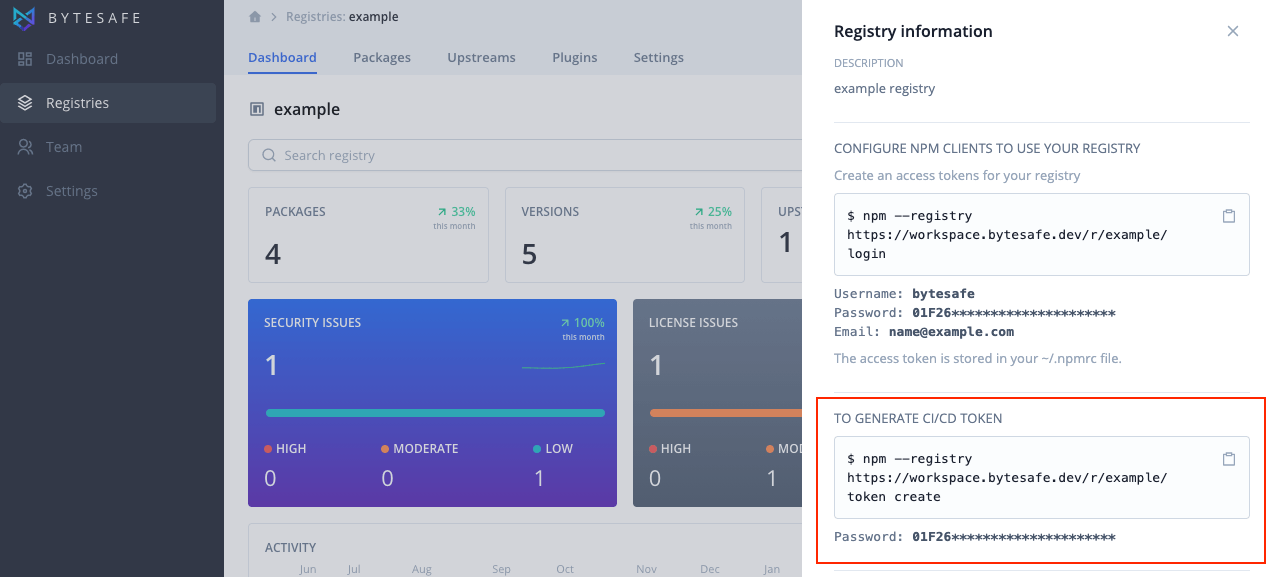
Users should take into consideration if they need a token that is read-only or not. CI/CD environments may only require read permissions.
npm you will need npm 6.8 or later. Earlier versions of the npm CLI contain a bug related to token creation.Read-write token
$ npm --registry https://{WORKSPACE}.bytesafe.dev/r/{REGISTRY}/ token create
The newly created read-write token is displayed in the terminal (run the command above and enter a valid password for the registry).
| token | 01EPF8PPQ9WZQ5TADPCV8DPMG5 |
|------------------|----------------------------------|
| readonly | false |
| cidr_whitelist | null |
| created | 2020-11-06T17:12:14Z |
Read-only token
$ npm --registry https://{WORKSPACE}.bytesafe.dev/r/{REGISTRY}/ token create --read-only
The newly created read-only token is displayed in the terminal (run the command above and enter a valid password for the registry).
| token | 01EPF8RQX26R2Q2ZCY28AP1JMH |
|------------------|----------------------------------|
| readonly | true |
| cidr_whitelist | null |
| created | 2020-11-06T17:13:21Z |
List all existing access tokens
To list all available tokens users can use either an npm client or the Bytesafe web application.
List tokens for a user from Bytesafe web application
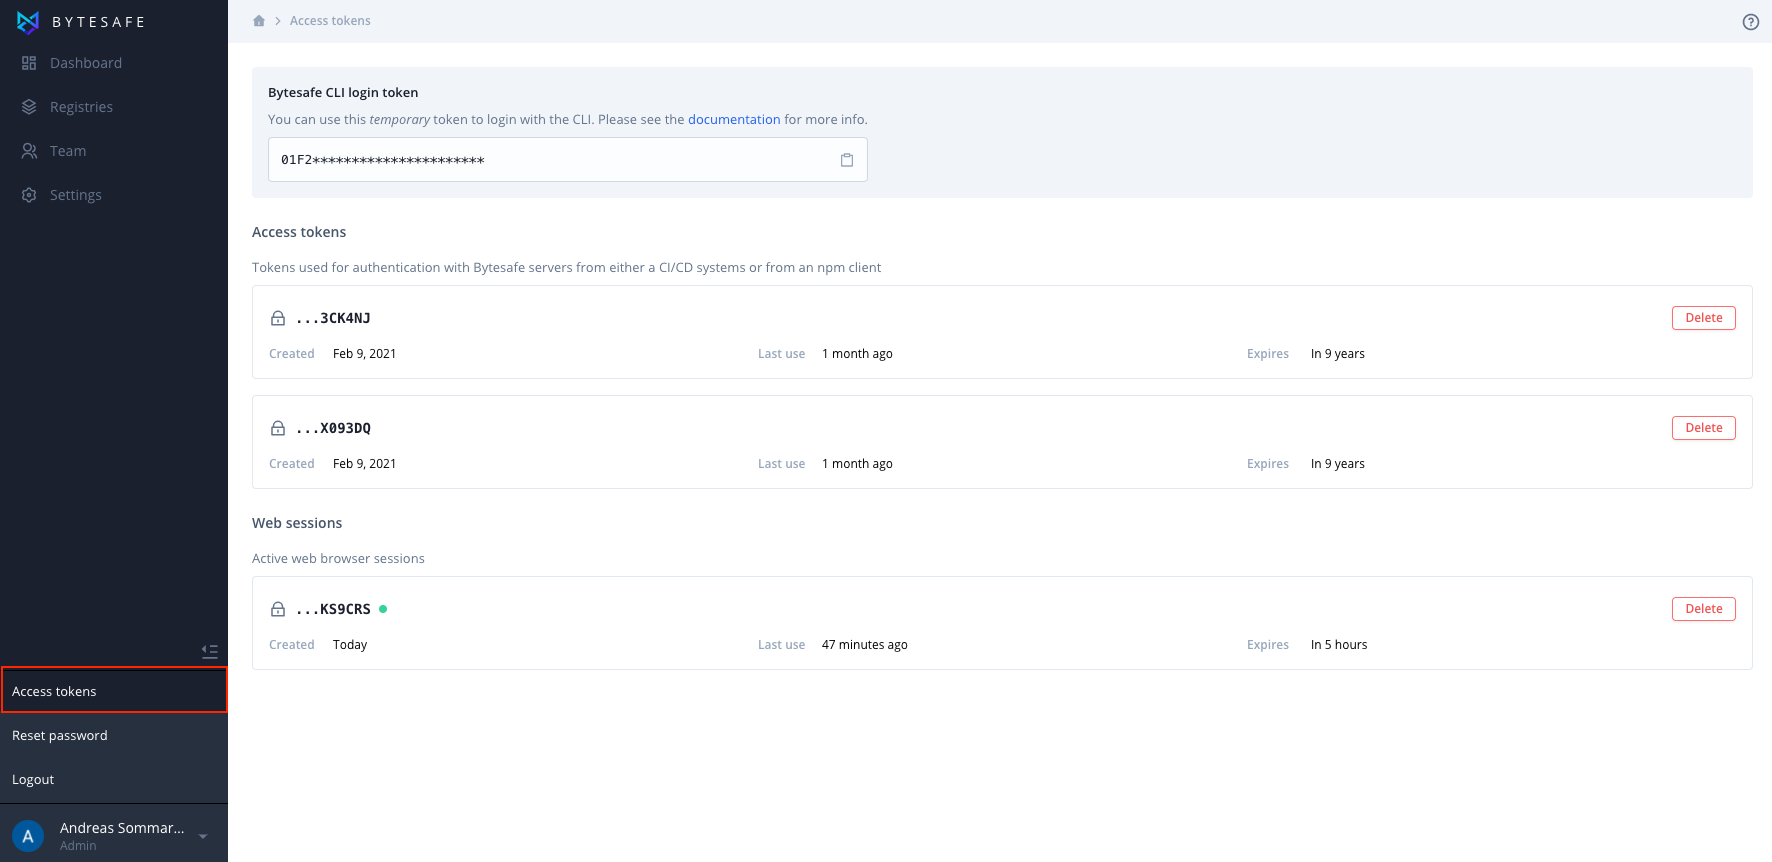
Go to the Access tokens page by expanding the profile menu in the bottom left corner of Bytesafe.
List access tokens using npm
$ npm token list
The output only shows the last couple of characters of the actual token (the full token is only available on creation).
The response when executing the command also includes information regarding if the token is read-only or not.
Example output with both read/write tokens
| id | token | created | readonly | CIDR whitelist |
|-----------|-----------------|-----------------|-----------|------------------|
| 2b4fc6 | KMQP71... | 2020-11-06 | no | |
| 85abee | 8DPMG5... | 2020-11-06 | no | |
| 807d1f | AP1JMH... | 2020-11-06 | true | |
Currently Bytesafe does not support CIDR whitelist.
Revoke a token
The tokens created are long-lived and will therefore be valid until they expire.
If you want to revoke a token use either an npm client or the Bytesafe web application
Delete access tokens using Bytesafe web application
Go to the Access tokens page by expanding the profile menu in the bottom left corner of Bytesafe.
To delete a token, click delete on the specific card.

Revoke an access token using npm
$ npm token revoke {token ID}
Example of how to remove a token.
$ npm token revoke 85abee
# The output confirms the number of removed tokens
Removed 1 token
You can also remove multiple tokens by providing a list of comma separated token IDs
Getting access denied when trying to create or list a token?
The request is most likely not providing the access token correctly to Bytesafe. See our troubleshooting page on how to resolve authentication issues.