Invite team members
Invite members to your team and collaborate on packages, registries and features in a workspace. Using the same workspace for your whole team allows for the same level of security for everyone.
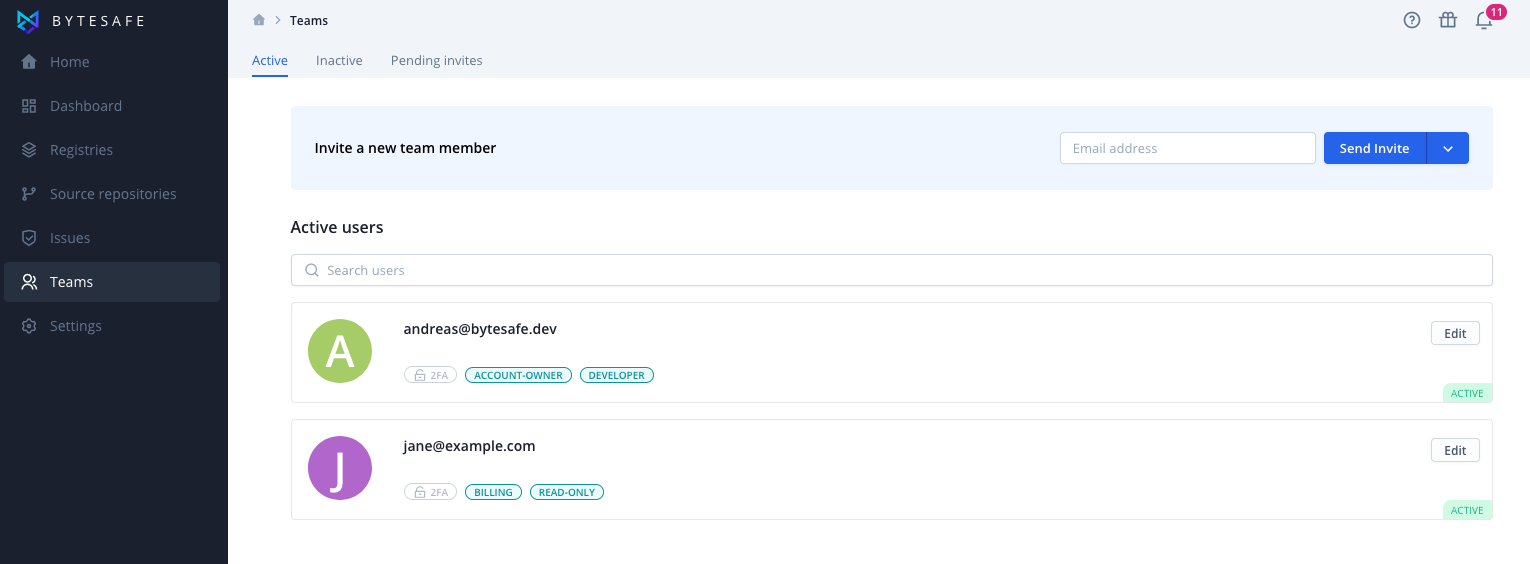
To invite additional team members, click on Teams in the main menu.
Inviting team members by email
Enter the email address of the person you want to invite. Click on the Send Invite button to send an invitation.
You can add any number of users which are included in your plan.
Read-only users can also be invited by email by selecting it from button drop-down. Read-only users does not count towards your plans user limits.
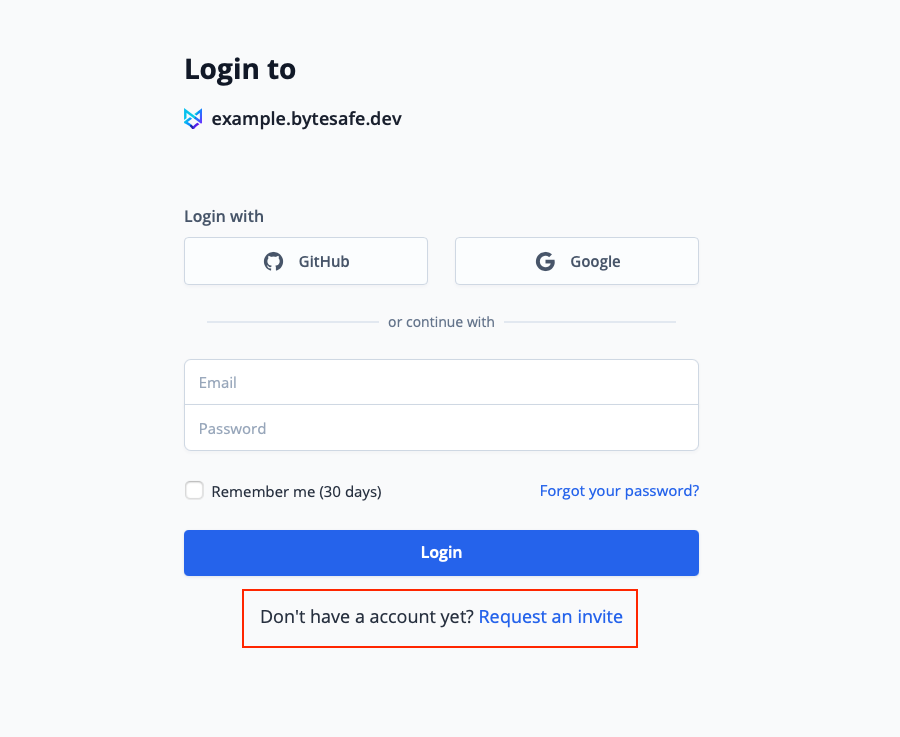
Requesting an invite
Alternatively potential users can request an invite by accessing any workspace link and requesting an invitation.
Notifications are sent to workspace admins. Pending request to request/deny are available in the Team page. Approving a request will send an invitation email to the user.
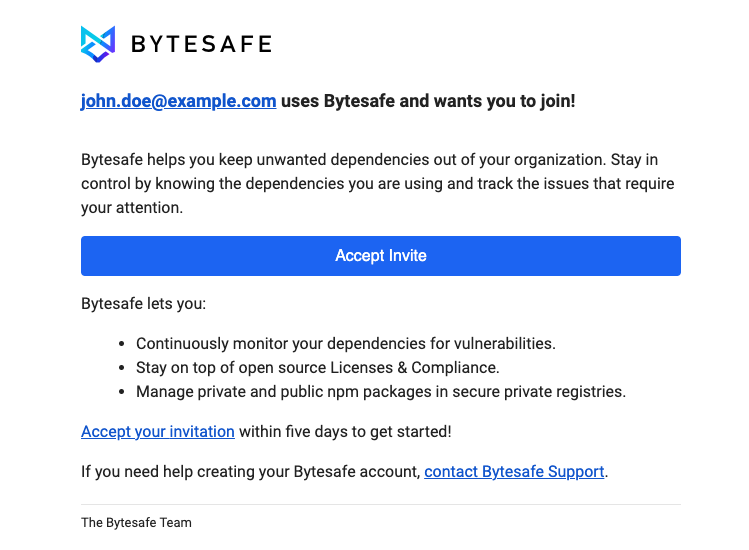
Accepting an invitation
When you have sent invitations to team members, they accept by clicking on Accept Invite in the invitation email.
Follow the instructions to create a new user linked to the workspace.

Team roles
In a team, members can be assigned different roles and the status of each member can be set to either active or deactivated.
New members are assigned the developer role (and optionally
You can find more information about user roles and Role-based access control in its own section.
Managing the team
To manage the team and change roles, click on Teams in the main menu.
Additionally, users can manage invites (re-send and delete) and requests (approve / deny) from the Team page.