SAML with Okta
1. Log in to your Okta Admin Dashboard and navigate to Applications → Applications.
2. Click on Create App Integration and select SAML 2.0. Click Next.
3. Enter a descriptive name for the SAML integration, e.g. “Bytesafe” and click Next to display the Configure SAML tab.
4. Configure settings for your Workspace.
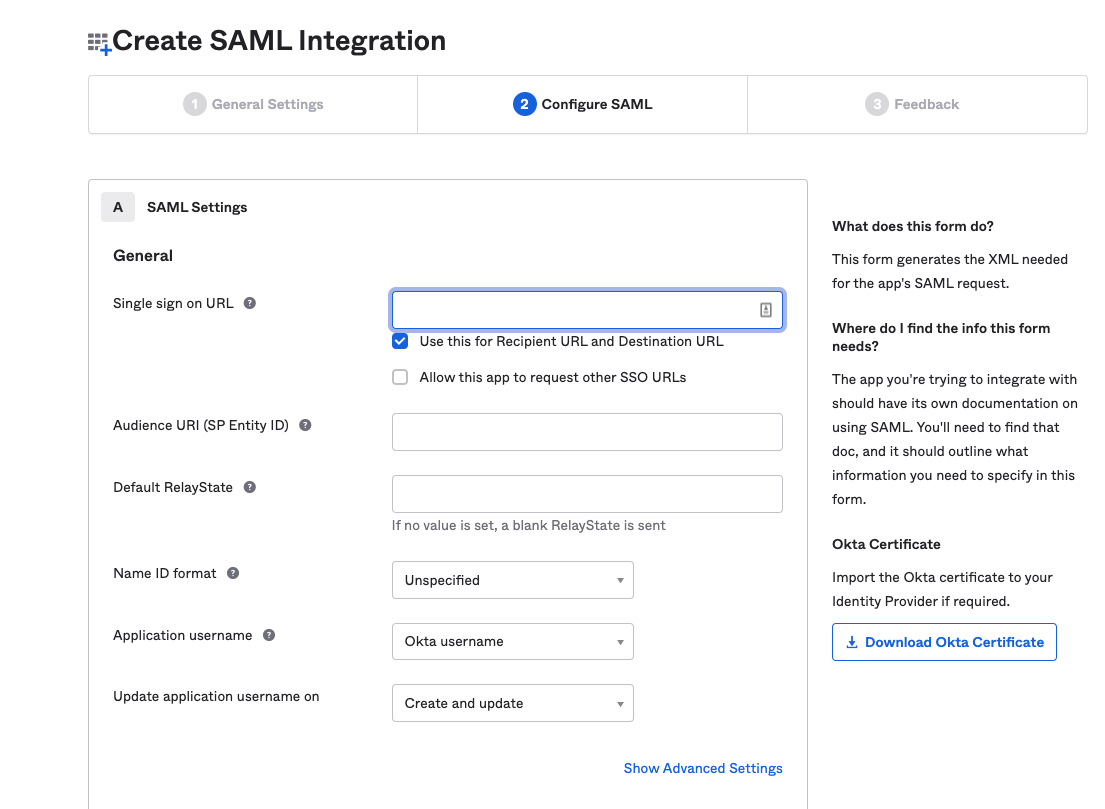
| Okta Setings | Bytesafe value |
|---|---|
| Single sign on URL | https://<WORKSPACE>.bytesafe.dev/saml/acs |
| Audience URI (SP Entity ID) | https://<WORKSPACE>.bytesafe.dev/saml/metadata |
| Name ID format | EmailAddress |
5. Configure Attribute Statements to include claims for user information.
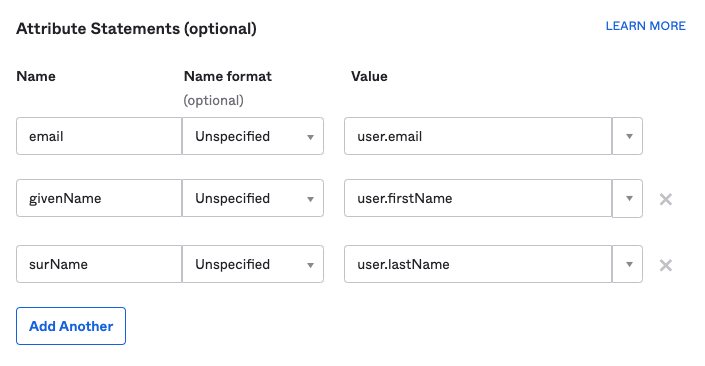
| Name | Value |
|---|---|
| user.email | |
| givenName | user.firstName |
| surName | user.lastName |
6. Save your App integration.
7. Download XML Metadata.
Important: The Metadata from Okta needs to be uploaded to Bytesafe to enable trust for your IdP.
Open the instructions page by clicking View Setup Instructions On the following screen copy the contents under Optional -> Provide the following IDP metadata to your SP provider.
8. Proceed to Enable SAML in Bytesafe for the last steps.