Enable SAML in Bytesafe
If you would like to use your existing Identity Provider (IdP) for managing your users centrally, you need to enable SAML in Bytesafe. Follow these steps in this order:
1. Open SAML settings
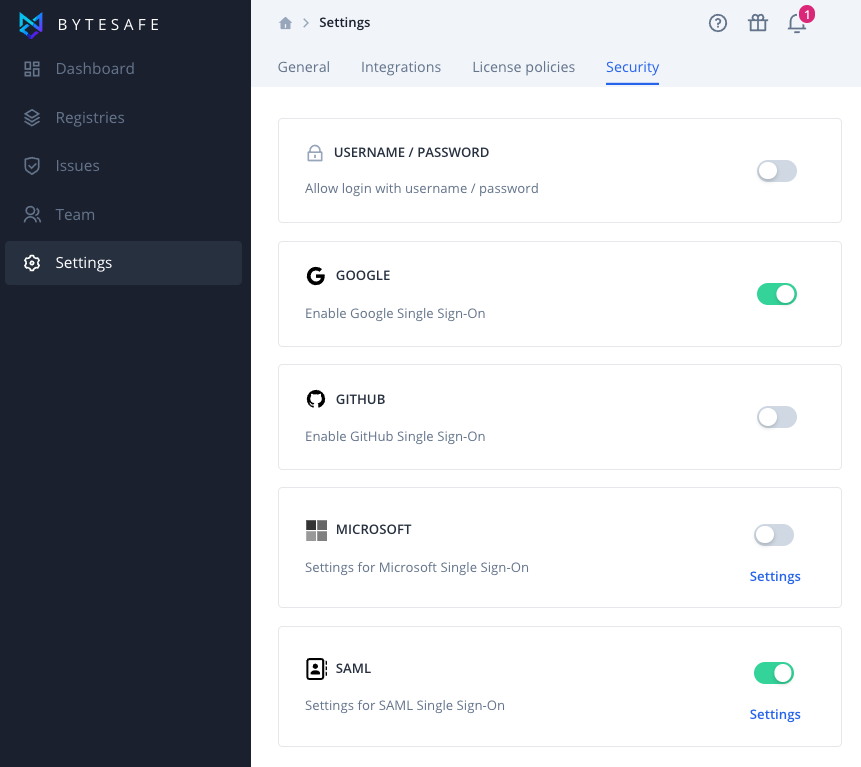
Using an Administrator account, Navigate to Settings → Security → SAML and click on the Settings link.
2. Provide SAML Metadata supplied by your Identity Provider
You’ll need to upload the configuration file (Metadata XML file) from your identity provider to Bytesafe and save the settings.
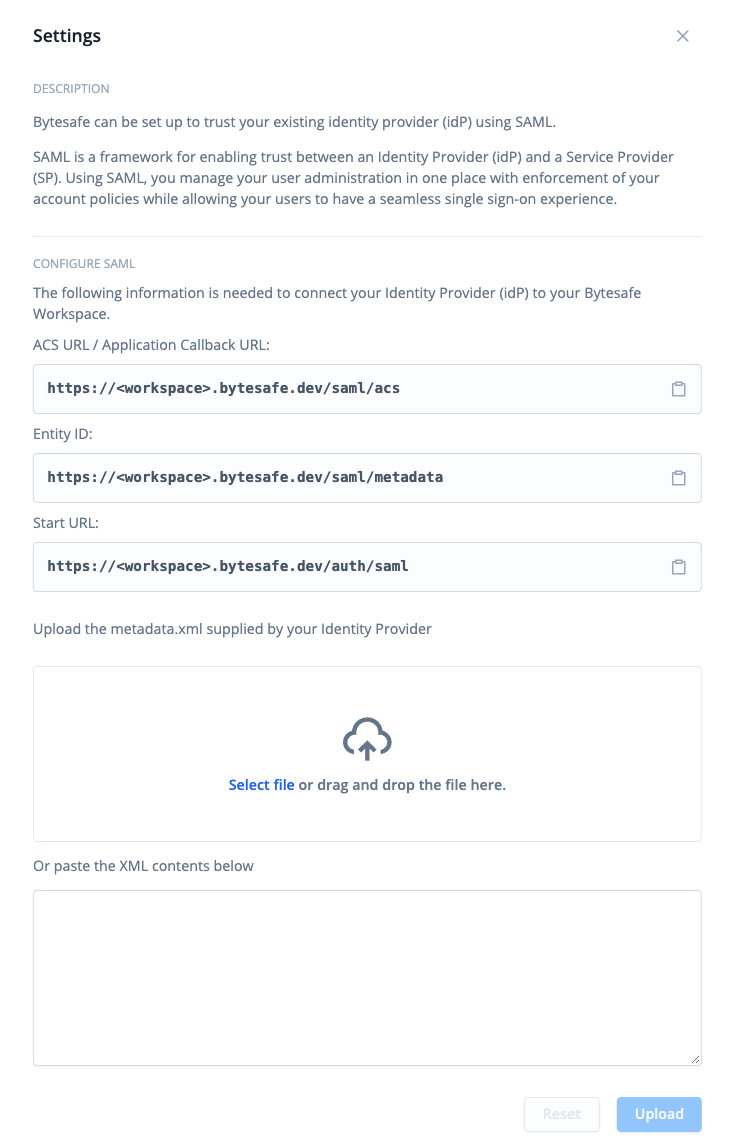
- Upload the the Metadata XML file downloaded from your Identify Provider by click Select file or simply drag and drop the file.
- If you prefer, you can alternatively paste the configuration as text in the textbox.
- Click Upload and Save Settings.
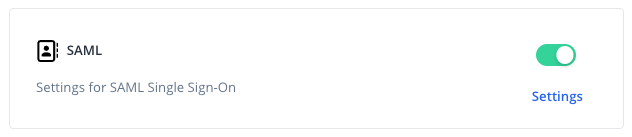
4. Verify that the SAML method is enabled
Make sure that the SAML method is enabled by checking that the toggle is green (to the right).
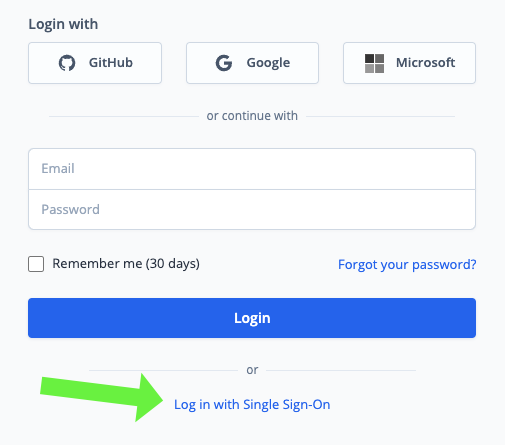
5. Verify by logging in using SAML
When logging in to your workspace, click Log in with Single Sign-On on the login screen. You should be logged in automatically.
Identity provider delays when provisioning updates
If you’re getting an error when verifying your SAML configuration, be aware that different identity providers can have different delays before changes have been provisioned.
Make sure your settings are correct and try again in a while.